It’s time to ditch the dumbbells, kick the kettlebells, and forget about those weight-training machines. OK, maybe not permanently, but at least long enough to add something new to your fitness routine:
TRX training techniques.
Invented by a former U.S. Navy SEAL, the TRX (short for total-body resistance exercise) turns every exercise into a challenge for the
core by using two very accessible resources:
gravity and our own bodyweight. All you have to do is anchor the TRX straps to a secure spot (think a weight machine, a door frame, or even monkey bars or a basketball hoop pole if you’re getting creative) and use either your feet or hands—depending on the exercise—to hold onto the straps.
In general, a part of your body will be suspended above the ground
or you’ll be leaning into or away from the straps to create resistance and destabilization. Knocking our balance out of whack gives us no other option but to adjust, which means engaging the
midsection and back and firing up the shoulders and hips to maintain control throughout the movement. Even better? Since the straps roll up into practically nothing, it’s a take-anywhere, do-anywhere kind of workout—provided you have somewhere stable to serve as your base.
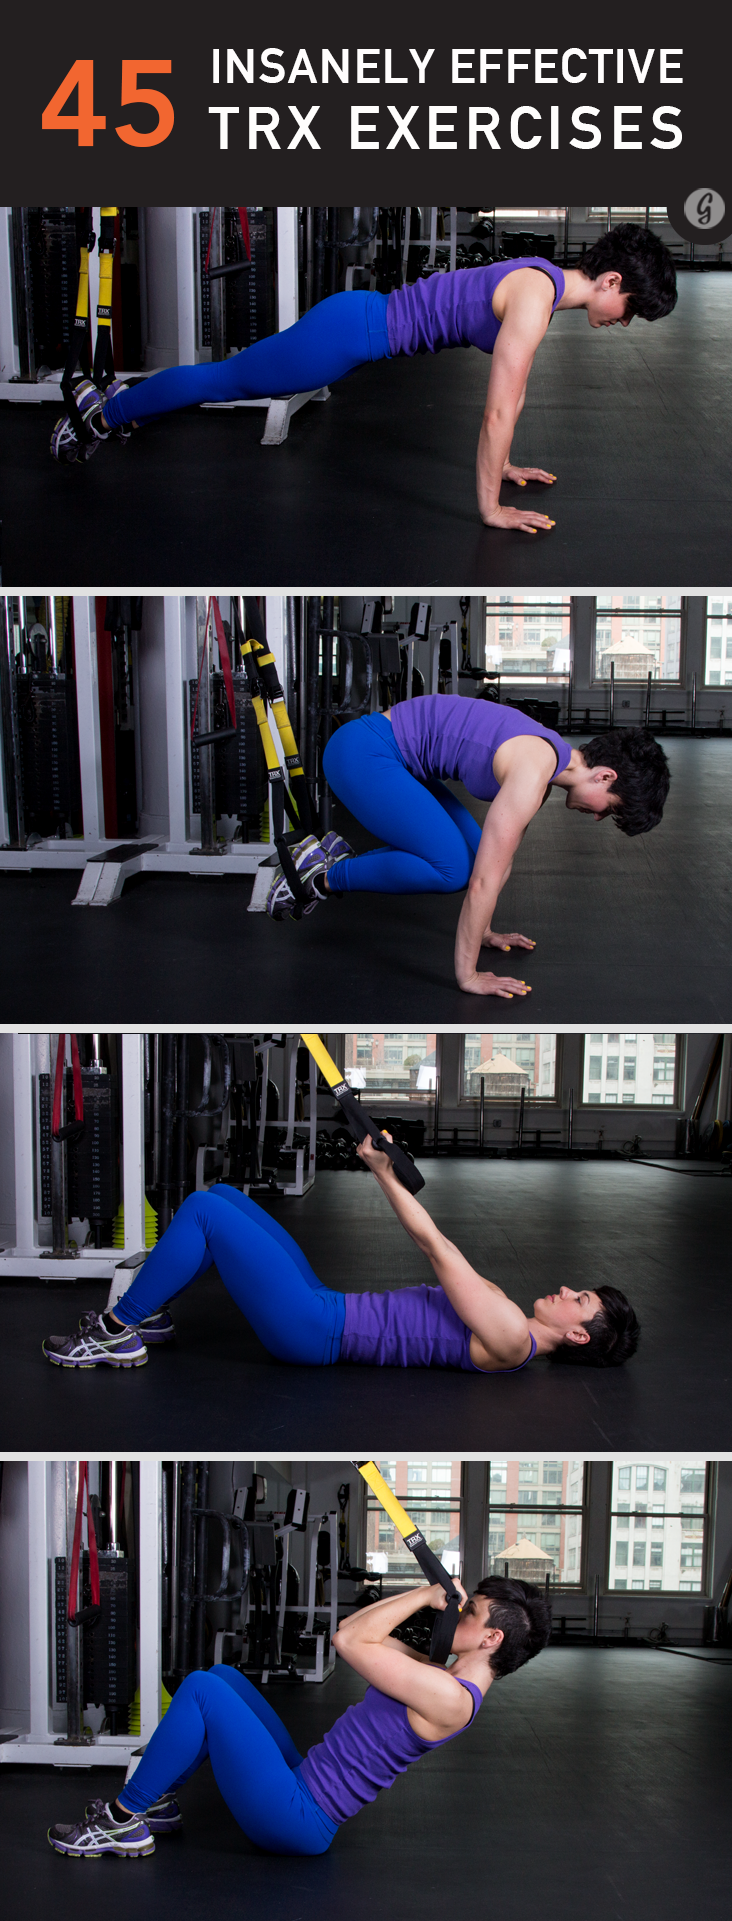
Ready to hang tough—and build SEAL-worthy strength? Give these 45 TRX moves a try!
UPPER BODY
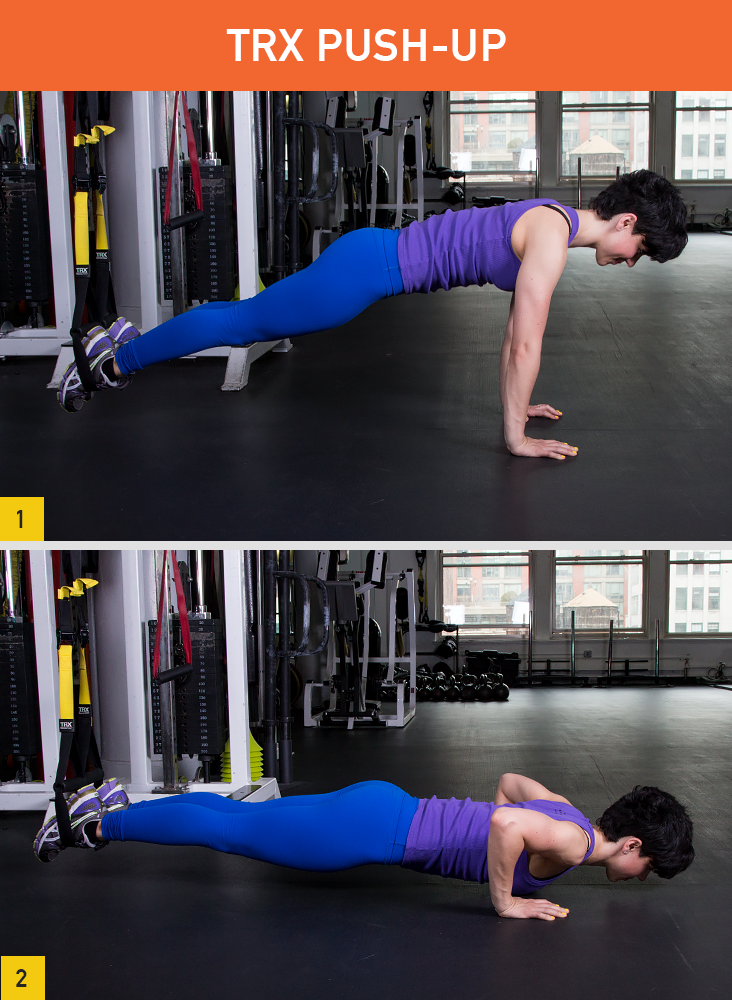
1. TRX Push-Up Targets: Shoulders, chest, arms
Difficulty: Beginner
How to: Here’s how you pump up the plain ol’
push-up. To start, hook toes through the TRX straps so that the tops of your feet face the floor. Lift your body up so that weight rests on the palms of your hands. Keeping core tight, bend elbows to lower your chest between hands. You’ll feel your chest and shoulders working as you press back up to the start position.
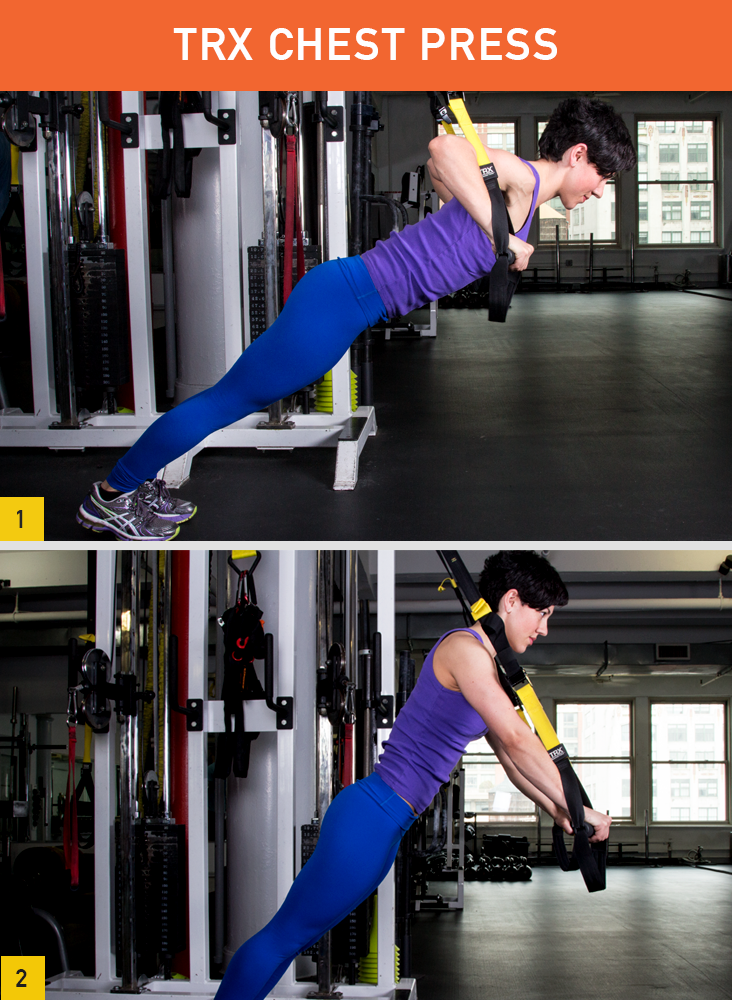
2. TRX Chest PressTargets: Arms, chest
Difficulty: Beginner
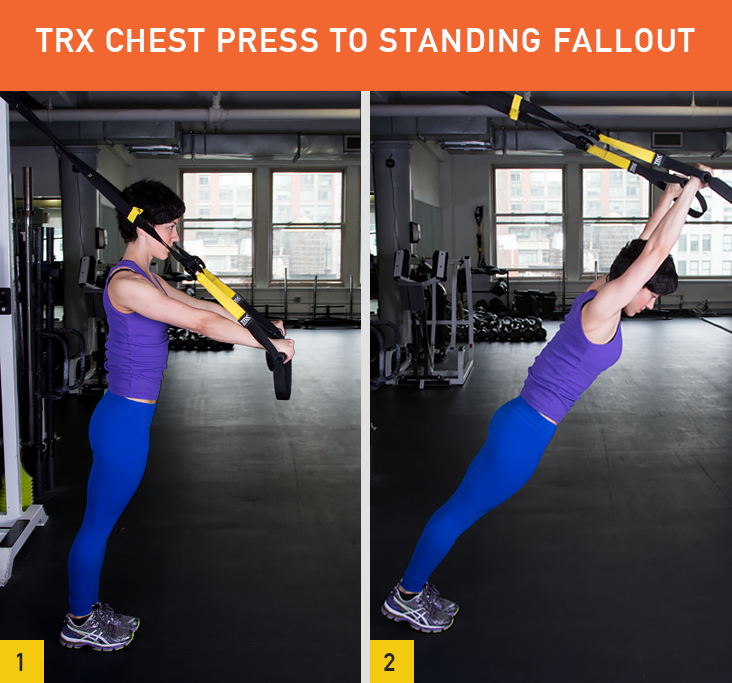
How to: Forget lying down to perform the typical chest press. Face away from the anchor with your feet shoulder-width apart. Grab the handles with an overhand grip and extend arms in front of you at shoulder height. Lean forward so that your body is at a slight diagonal. Bend elbows and lower chest between your hands. You’ll engage your chest and arms as you push yourself back up to the start position.
3. TRX Inverted RowTargets: Biceps, lats
Difficulty: Beginner
How to: Row, row, row your… way to a fitter physique. Lie directly underneath the TRX. Bend knees and plant your feet on the floor. Reach up to grasp the handles, palms facing each other, arms fully extended, as you lift your body a few inches off the floor. Keeping them close to your sides, bend your elbows to pull torso up towards the handles until your body forms a straight line from shoulders to knees. Lower down to the starting position. You’ll put your biceps and back to
work as you raise and lower your torso, slowly and with control. You can also perform this exercise with straight legs, heels grounded to the floor, and your body at a diagonal.
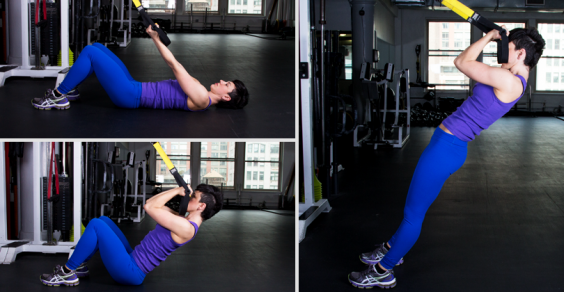
4. Kneeling Triceps PressTargets: Triceps
Difficulty: Beginner
How to: Target those tris with this no-frills move. Kneel down facing the anchor and grab the straps with an underhand grip. Stretch arms straight out in front of you and hold them shoulder-width apart. Bend elbows to lower your upper body toward the floor until hands are in line with your ears—this is when you’ll start to feel those triceps burn. Return to start.
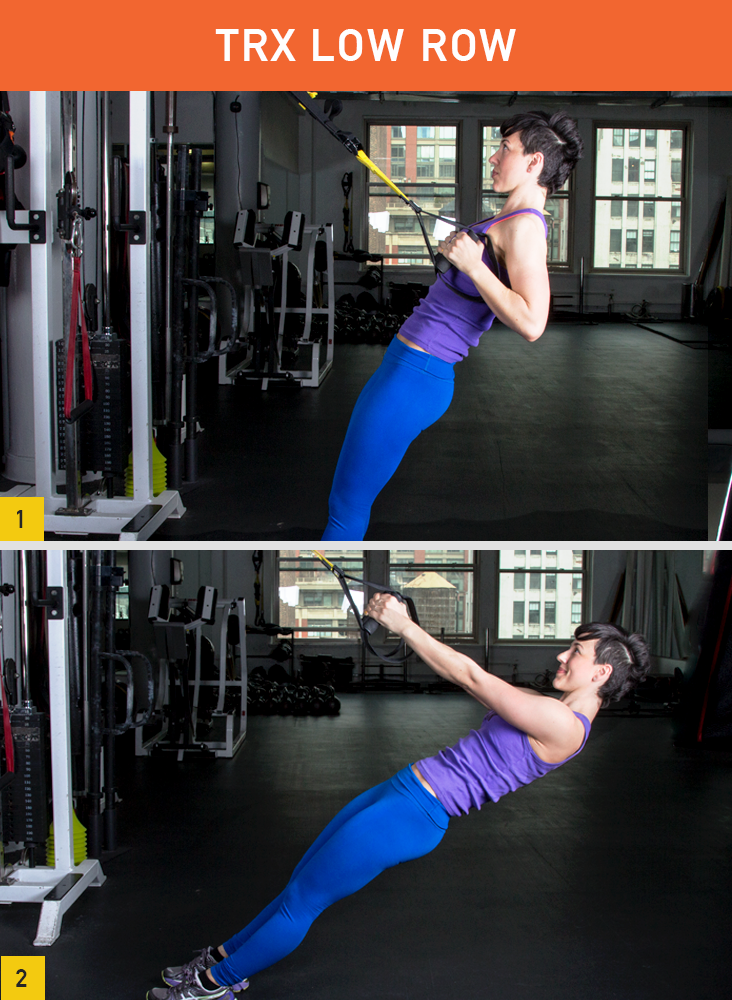
5. Low RowTargets: Back, abs, shoulders, biceps
Difficulty: Beginner
How to: This move is the key to a strong back. Grab the handles with your palms facing one another. Lean all the way back until weight is on your heels, arms extended out in front of you, and body forms a diagonal. Squeeze shoulder blades together and keep your core tight as you bend your elbows and pull torso up to meet your hands. Lower to return to start.
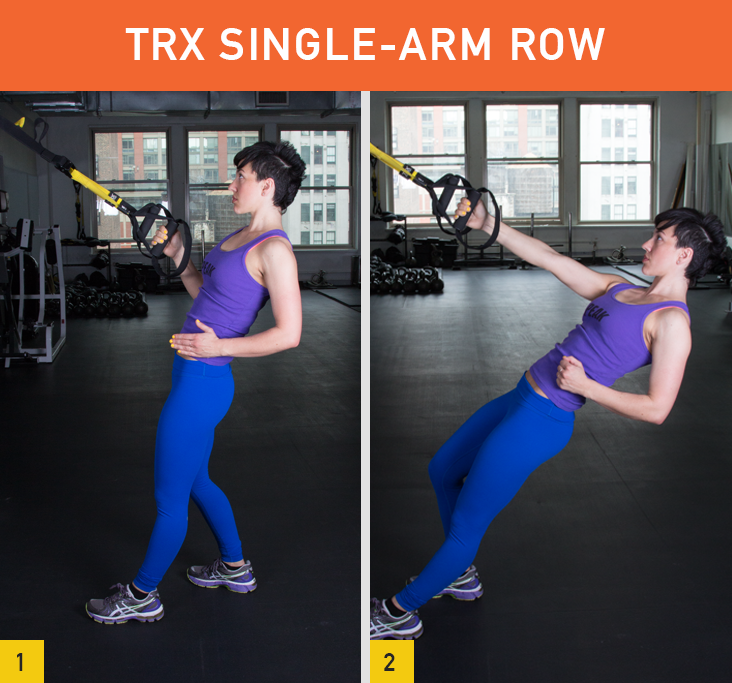
6. Single-Arm RowTargets: Back, abs, shoulders, biceps
Difficulty: Advanced
How to: If you’re a pro at the regular low row (see No. 5), challenge yourself to the exact same movement. Except this time around, limit rowing to one arm at a time without losing your form—and get ready to feel the burn.
7. Three-Way RowTargets: Back, abs, shoulders, biceps
Difficulty: Intermediate
How to: If anyone knows a thing or two about sculpting rock-solid shoulders, it’s superstar swimmer Natalie Coughlin. And as it turns out, she’s a fan of TRX—she even shared some of her go-to
moves, including this three-in-one exercise. This move includes three different grips to keep your mind and body guessing. Your plan of action: Row with your palms up for a few reps (Natalie suggests three reps per grip), switch to rowing with palms facing one another for a few reps, and then turn palms down for a few reps.
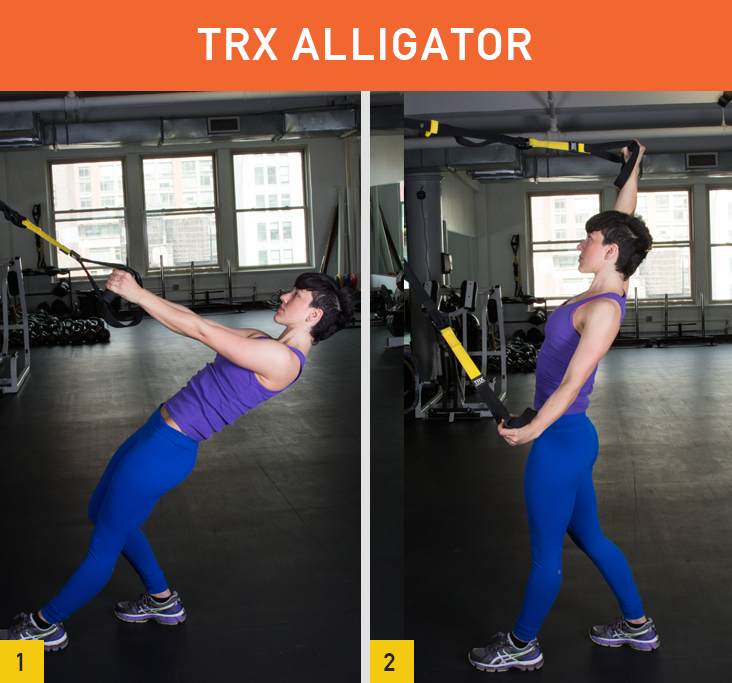
8. AlligatorTargets: Shoulders, back, obliques
Difficulty: Intermediate
How to: Another of Coughlin’s
favorite TRX moves, this shoulder strengthener is also known as a
reverse fly (though “alligator” is
way more catchy, if you ask us). Start facing the anchor and grab the handles with an overhand grip. Lean back until your body forms a diagonal line and the TRX straps are taut. Pull body up as you pull back and up with your right arm and back and down with left arm. Rotate torso to the right as you do so—you’ll put your shoulders and back to work as your obliques help stabilize your movements. Return to start and repeat on the other side.
9. Triceps ExtensionTargets: Triceps
Difficulty: Beginner
How to: Work those tris with this simple but challenging move! Set yourself up like you did for the push-up—facing away from the anchor point, feet shoulder-width apart. Grab the handles with an overhand grip. Shift weight to the balls of your feet as you extend arms out in front of you at eye level. Bend elbows until hands are behind your head, elbows framing either side of your face. Return to start. The movement is small, but super effective, and you’ll fire up your triceps with every rep.
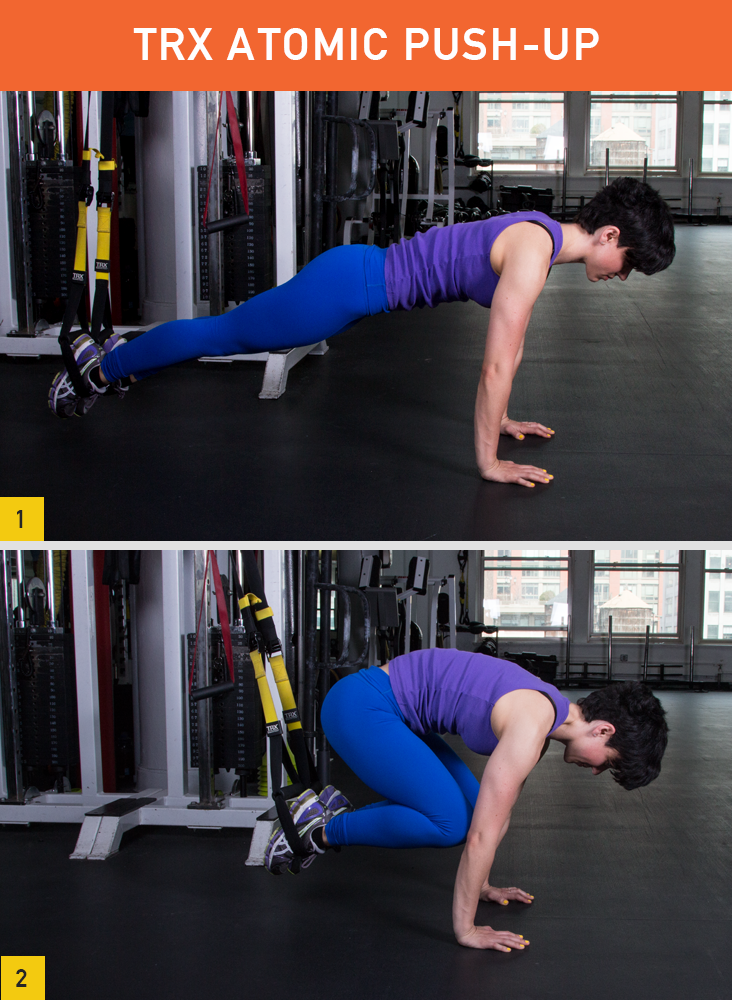
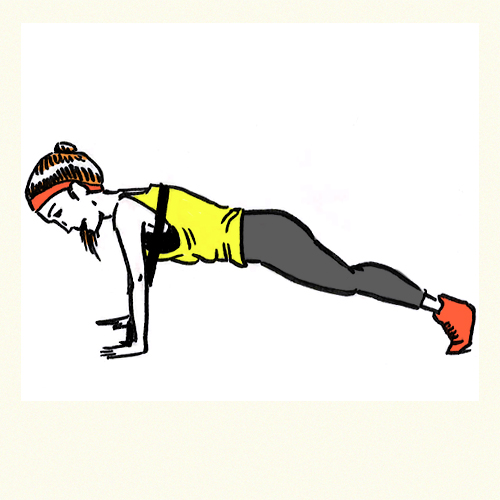
10. Atomic Push-UpTargets: Chest, shoulders, arms, and abs
Level: Advanced
How to: You might look a bit like a frog in motion, but you’ll definitely feel the burn in your upper body and core as you bring your knees to meet your elbows. Slip your feet into the cradles so that the tops of feet face the floor. Lower body down into a push-up. As you press your body back up into plank position, bring knees in toward elbows, allowing legs to draw apart. Hold for a few seconds and then return to start.
11. Chest FlyTargets: Chest, arms
Difficulty: Advanced
How to: If there’s any exercise that will make you feel like you have wings, this is it. Face away from the anchor with feet shoulder-width apart. Grab the handles with an overhand grip and extend arms in front of you at shoulder height. Lean forward so that your body’s at a diagonal. With control, spread arms out to a “T” (but keep elbows bent) as you lower your chest closer to the ground—this is where you
seriouslyactivate those chest muscles. Reverse the movement to return to start.
 12. Biceps CurlTargets:
 Abs and arms
Difficulty: Intermediate
How to: Face toward the TRX anchor point and grab one handle in each hand, palms facing. Lean all the way back until your arms are extended and the strap is taut. To activate your biceps, bend elbows (without letting them drop) until hands frame your temples, slowly pulling body up as you do so. Return to start—and then ask for two tickets to the gun show, please.
Jack Johnson
, of course). Get into your suspended plank position, perform a pushup, and then lift hips up into a pike—your body should look a bit like an upside-down “V." Your abs will work overtime to bring you up and out of this motion. Be sure to keep legs straight and feet together throughout the movement.
14. Y FlyTargets: Abs, biceps, back
Difficulty: Intermediate
How to: The real question is:
Why not fly? Stand facing the anchor with feet hip-width apart. Grasp the TRX and extend arms overhead into a Y, palms facing. Lean back on your heels until body forms a diagonal line, pulling your arms in and out in front of you until your palms nearly touch. Leading with hips, pull your body back up to stand, spreading arms back into a Y as you do. You’ll feel your back muscles working as you move from the “down” position to the “Y” position, and your abs will help you maintain stability throughout the movement.
15. Clock PressTargets: Abs, shoulders, back, biceps
Difficulty: Advanced
How to: Tick, tock, tick, tock: the countdown is on for a super fit upper body, and this move gets you one step closer. Grab the handles with an overhand grip and lean forward until your body forms a diagonal line, weight on toes. Brace your core and bend elbows, keeping them close to your body—you’ll remain in this “down” position throughout the exercise. Keeping your left arm bent, extend right arm to the side until right elbow and wrist are almost in line with shoulder—this is when your shoulders, back, and biceps will start to burn. Reverse the movement to return to start and repeat with left arm. Continue alternating.
16. Power PullTargets: Upper back, abs, shoulders, obliques
Difficulty: Intermediate
How to: Power pulls make for powerful bodies, especially since this move includes a rotation to fire up your abs and obliques in addition to your upper body
. Stand facing the anchor with a wide stance. Grasp the TRX with your left hand and hold it at chest height, left elbow high and pointing behind body. Extend right arm so that it’s in line with the TRX. As you lean back, extend your left arm and rotate torso to the right to reach your right arm out and slightly behind you. Reverse the movement to return to start.
17. Standing FalloutTargets: Chest, abs, shoulders
Difficulty: Intermediate
How to: Get ready to set those abs on fire.
Get yourself in the starting position for a TRX chest press (see No. 2). Then, as you fall forward, reach arms up until they’re in line with the rest of your body—this is where your abs and shoulders
really come in handy. Reverse the movement to return to start.
18. T Deltoid FlyTargets: Back, shoulders
Difficulty: Intermediate
How to: This moves suits our fitness needs to a "T," with a flying motion that strengthens the upper back and sculpts shoulders to perfection. Face the anchor, stagger your stance (right foot should be a few inches in front of left), and grasp one strap in each hand. Lean back so that weight is on your left foot and the TRX straps are taut, arms extended in front of chest. Pull against the TRX, shifting weight to your right foot as you open your arms into a “T” position. Return to start.
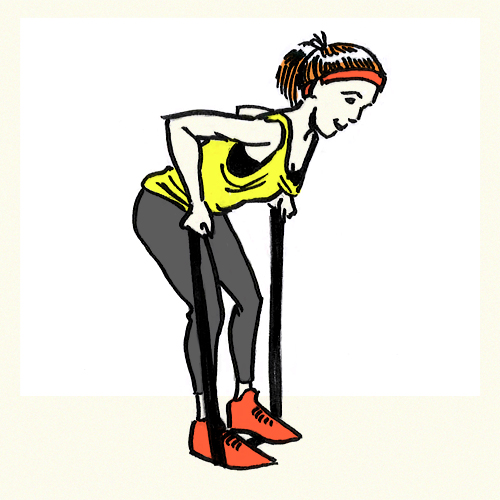
19. Side-Straddle Golf SwingsTargets: Back, chest, shoulders
Difficulty: Beginner
How to: While you won’t exactly feel like you’re golfing when performing this move, this exercise involves a swinging movement that challenges your upper body in a new way. Facing the anchor point, assume a wide-leg stance and grab one TRX handle with each hand with an overhand grip. Keeping weight on your heels, bend forward at hips and reach arms forward at chest height. Look forward throughout the move. Rotate your torso, extending right arm behind you while you extend the left arm in front of you. Reverse the movement to repeat on the other side.
LOWER BODY
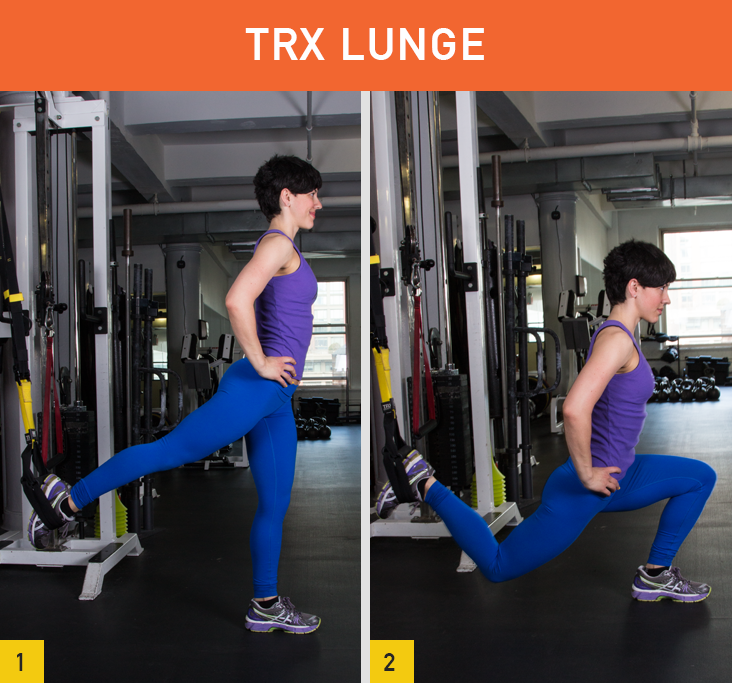
20. LungeTargets: Legs and abs
Difficulty: Beginner
How to: If regular lunges have become a piece of cake, up the ante with this move. Not only does it work your lower body like a traditional lunge, but it’ll also lead to better
balance and stability. Facing away from the anchor point, place your left foot in both TRX straps, and plant your right foot firmly on the ground. Lower down into a lunge, extending the left leg behind you, without losing the bend in your knee. Return to starting position and repeat on the other leg. You’ll feel your lower body and abs working hard throughout this movement—both to actually complete the movement and to stabilize your body.
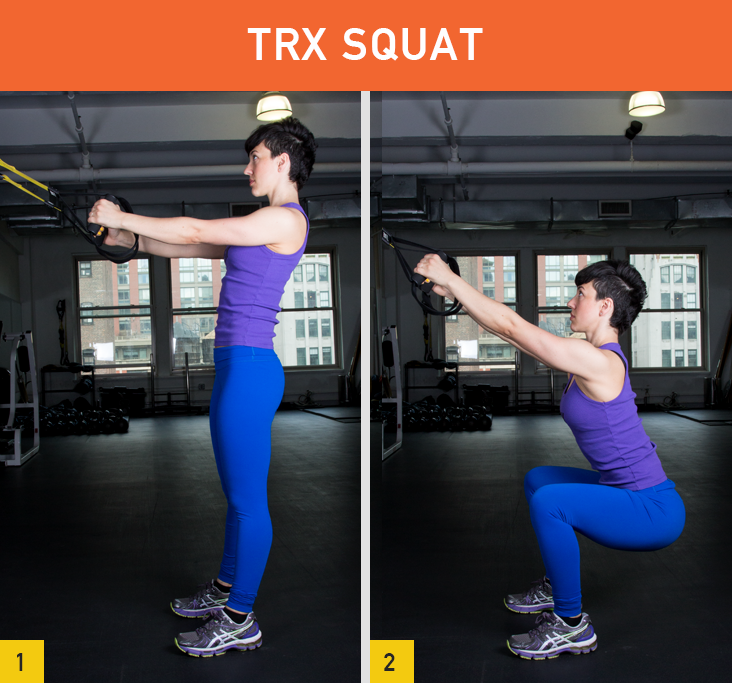
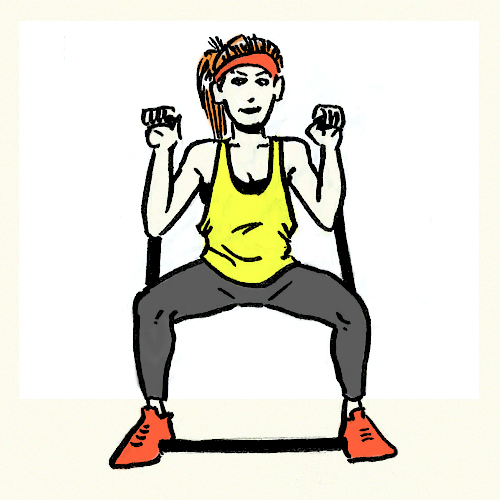
21. SquatTargets: Abs, quads, glutes, hamstrings
Difficulty: Beginner
How to: Regular squats are essential to build a strong lower body. Add a TRX to the mix to help improve your
form, or even give you some stability and support (if you need it). Start off by holding both handles in front of your waist, elbows bent by sides. Lower down into a squat, extending arms in front of you at eye level. Push yourself back up to start.
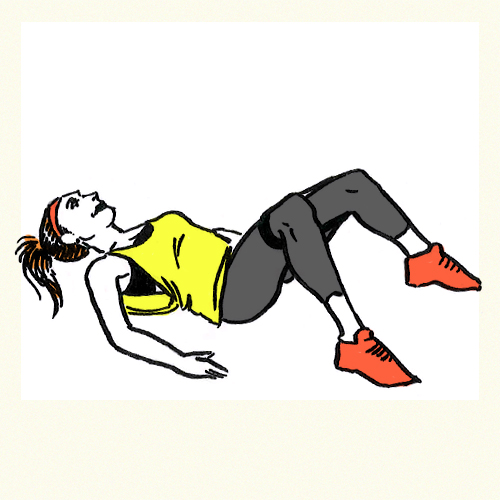
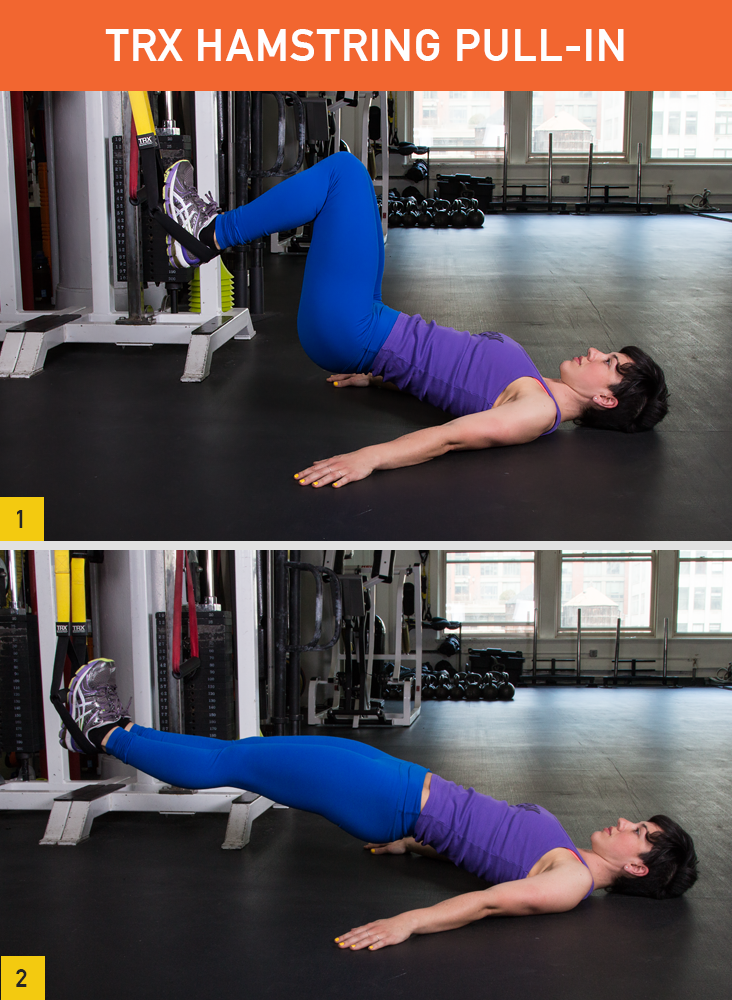
22. Hamstring Pull-In/Hamstring CurlTargets: Thighs, glutes, hips
Difficulty: Intermediate
How to: Get your hammies in on the action! Lie faceup with arms extended by sides. Place heels in the cradles and press down to secure them. Keeping your core tight, lift hips off the floor. Pull your heels in toward hips in a smooth and controlled motion (there’s no swinging here!). Straighten legs back to the starting position.
23. Single-Leg Hamstring Pull-In/Hamstring Curl Targets: Thighs, glutes, hips
Difficulty: Intermediate-advanced
How to: Isolate the strength-training movement to one leg at a time, and boom—you’ve got a pretty killer variation on the regular hamstring exercise. Start off as you would to perform the hamstring pull-in (see No. 22), but instead of pulling both heels toward your hips at the same time, alternate legs. Isolating legs will make this move even more challenging.
24. Curtsy Lunge/Crossing Balance LungeTargets: Quads, glutes, calves
Difficulty: Intermediate
How to: It might have a pretty name, but this move is one tough leg exercise. Face the anchor and grab the TRX handles, keeping elbows bent by your sides. Raise your right knee until thigh is parallel to the floor. Squat low, simultaneously swinging your right leg behind and across your body until you can place your right toes on the ground to the left of left foot. Return to start. You’ll fire up your entire lower body as you move through this movement.
25. Lateral LungeTargets: Glutes, hamstrings, quads, adductors
Difficulty: Beginner
How to: Don’t limit your lunges to the typical backward and forward variety. The side movement engages your hip adductors, which help your
glutes and quads move properly. Stand facing the anchor, feet shoulder-width apart. Hold a TRX handle in each hand in front of your waist, elbows bent by your sides. Plant right leg firmly in the ground and take a big step to the side with left leg, bending left knee as you lower your body into a side lunge. Push back to start and repeat on the other leg.
26. Curtsy Lunge to Lateral LungeTargets: Quads, glutes, calves, hamstrings, adductors
Difficulty: Advanced
How to: Challenging on their own, these two moves make an even more powerful pair. Perform the curtsy lunge (No. 24) immediately followed by the lateral lunge (No. 25). Now’s the time to multitask your way to fitness!
27. Single-Leg PliéTargets: Quads, glutes, calves
Difficulty: Intermediate
How to: This move’s a whole lot like the curtsy lunge, but with an added bonus: A knee-up movement that really makes you feel the burn throughout your legs. Start by facing the anchor. Hold the TRX out in front of you, palms facing. Bend your elbows and position them by your sides. Bring right knee up in front of you, until upper leg is at a 90-degree angle. Lower down into a squat, bringingright leg back behind left, without letting right leg touch the ground. Reverse the movement and return to the knee-up position.
TOTAL BODY
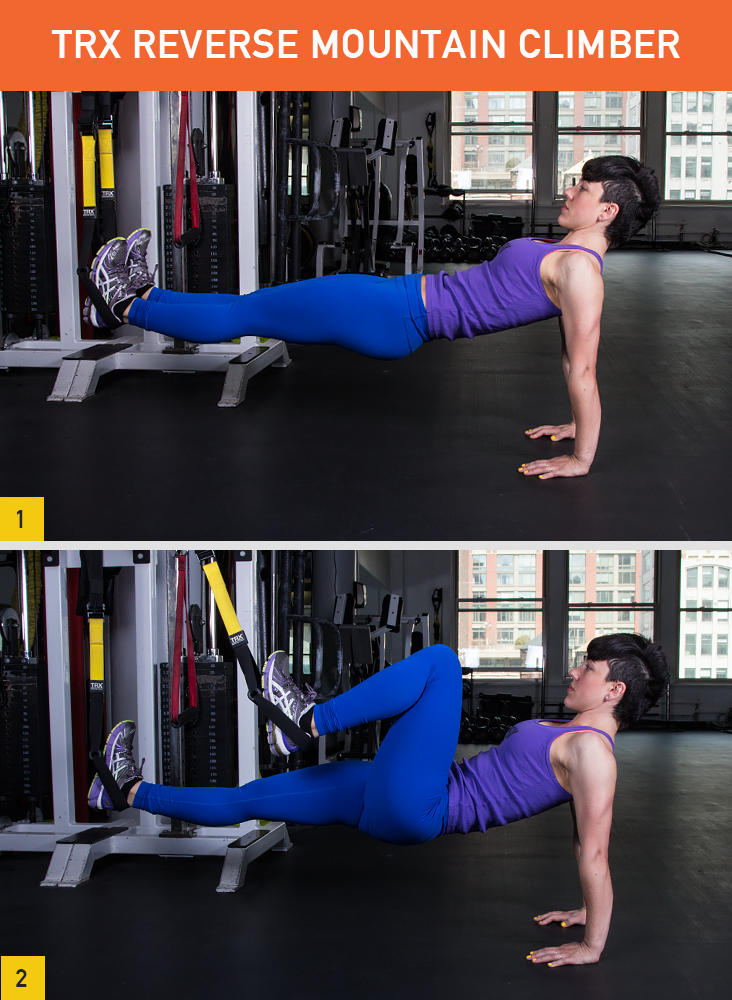
28. Reverse Mountain ClimberTargets: Triceps, abs, hip flexors, quads, hamstrings
Level: Intermediate
How to: Thought regular mountain climbers were tough? Try flipping your body and use your arms to hold yourself up from behind, engaging your entire body as you push through the movement. Sit underneath the TRX and hook your heels into the foot cradles. Place palms on the floor behind you with your fingers pointed toward your feet. Lift your body off the ground, keeping a slight bend in elbows. Bring right knee into your chest, extend back to start, and immediately repeat with the left knee. Alternate as quickly as you can without losing form.
29. Suspended Plank with AbductionTargets: Abs, hips, shoulders, obliques
Difficulty: Intermediate
How to: Give a regular suspended plank a little extra push by getting your legs and hips in on the action. Get into regular suspended plank position. Keep core tight and separate your legs as wide as you can without losing your form—this is when you’re putting your hips to work. Pause for a few seconds and return to start.
30. Squat and FlyTargets: Quads, glutes, calves, hamstrings, hip flexors, abs, shoulders, delts
Difficulty: Intermediate
How to: A truly excellent total-body move, this exercise will work you from your head to your toes. Stand with legs shoulder-width apart and grasp the handles in front of you. Lower yourself into a squat as you extend arms up in front of you. Explode up to stand, spreading arms open to form an overhead “V."
31. Knee Drive/Sprinter StartTargets: Quads, calves, glutes, outer thighs, hamstrings, lower back, and abs
Difficulty: Intermediate-advanced
How to: For
sprinter-worthy legs (ever notice how muscular their quads are?), add this move to your routine. You’ll fire up your entire lower body and use your core strength to stabilize yourself throughout the movement. To start, face the TRX anchor and grasp the handles in front of your chest. Lean forward, shifting weight to the balls of your feet until the straps become taut. Bend your left knee in front of you. Keep core engaged and drive right knee forward until your right thigh is parallel to the floor beneath you. Pause at the top, and then return to start.
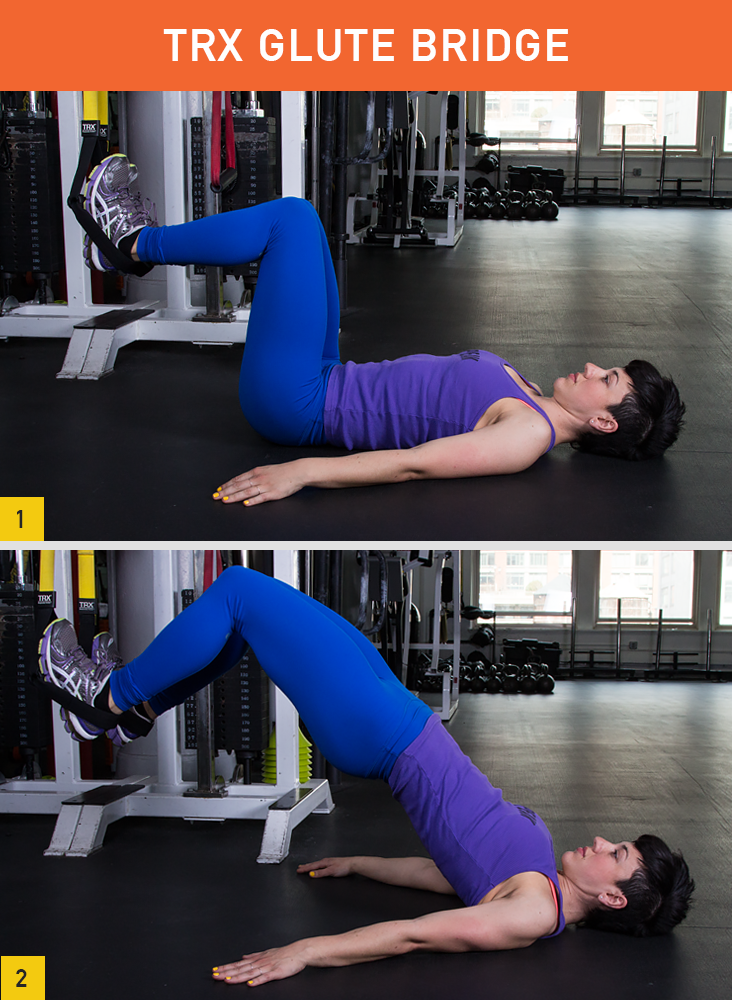
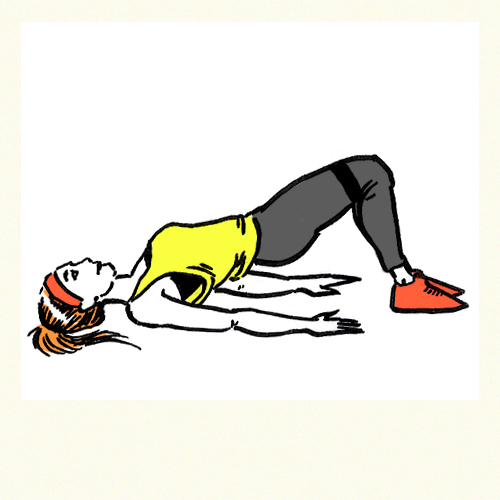
33. Glute BridgeTargets: Glutes, hamstrings, back
Difficulty: Beginner
How to: If regular
glute bridges are the key to a superior posterior, then just imagine what added instability can do for the rear view. Hint: It’ll make your hamstrings and glutes work even harder, and also pulls your back muscles into the equation. To start, lie on your back and hook ankles in the cradles. Bring heels close to your hips until your legs form a 90-degree angle. Extend arms out beside you and lift your hips up until upper body’s at a diagonal. Lower back down to start.
33. Mountain ClimberTargets: Abs, glutes, quads, hamstrings, shoulders, chest, and upper back
Difficulty: Intermediate
How to: Walking—even running—on air isn’t just for science fiction anymore. Flying through this move will get your heart rate soaring, torch some serious calories, and set your muscles on fire. Slip your feet into the cradles and settle into your trusty plank position. Just as you would with your feet on the floor, alternate between bringing each knee to your chest, speeding up without losing control over your movements—a much bigger challenge when your feet are dangling in the air!
34. Single-Leg BurpeeTargets: Shoulders, chest, arms, abs, butt, legs
Level: Advanced
How to: Ah, burpees. The exercise everyone loves to hate, now made even more challenging for some serious strong-body benefits. To start, adjust the TRX strap so that it hangs at mid-calf. Place your right foot in the loop behind you. Lower your body down into plank position, but keep your free left foot suspended in the air next to right foot. Lower into a push-up and, as you raise your torso back up, pull left foot to your chest as you return to stand.
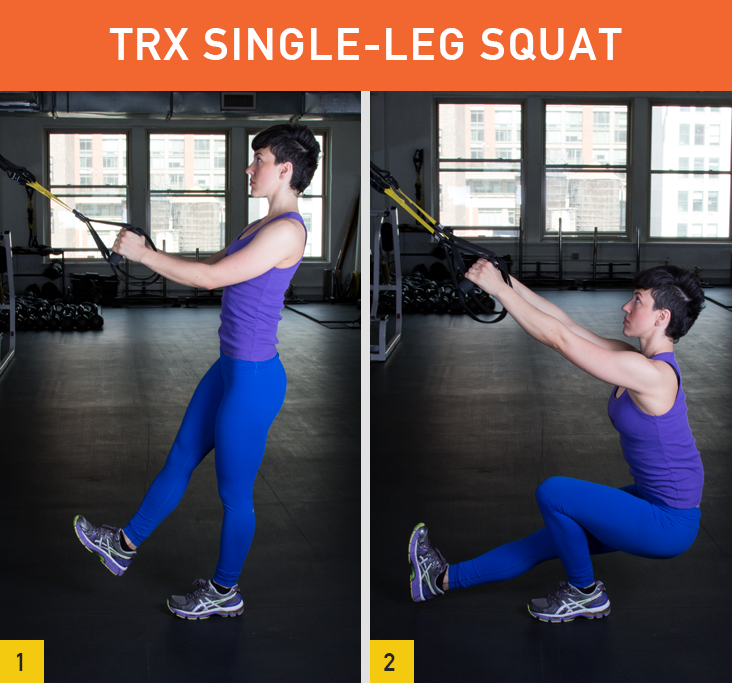
35. Single-Leg SquatTargets: Abs, butt, legs, and arms
Difficulty: Intermediate-advanced
How to: Since traditional single-leg squats can be struggle-city for a lot of us, we’re pretty thrilled that this move provides as much (or as little) assistance in the stabilizing department as we might need. Start by holding both handles in front of your waist, elbows bent by your sides. Lift left leg out in front of you so that it’s parallel to the floor. Lower down into a squat on your right leg, extending arms in front of you at eye level. Push yourself back up to start. You’ll feel your lower body working as you lower down and push yourself back up.
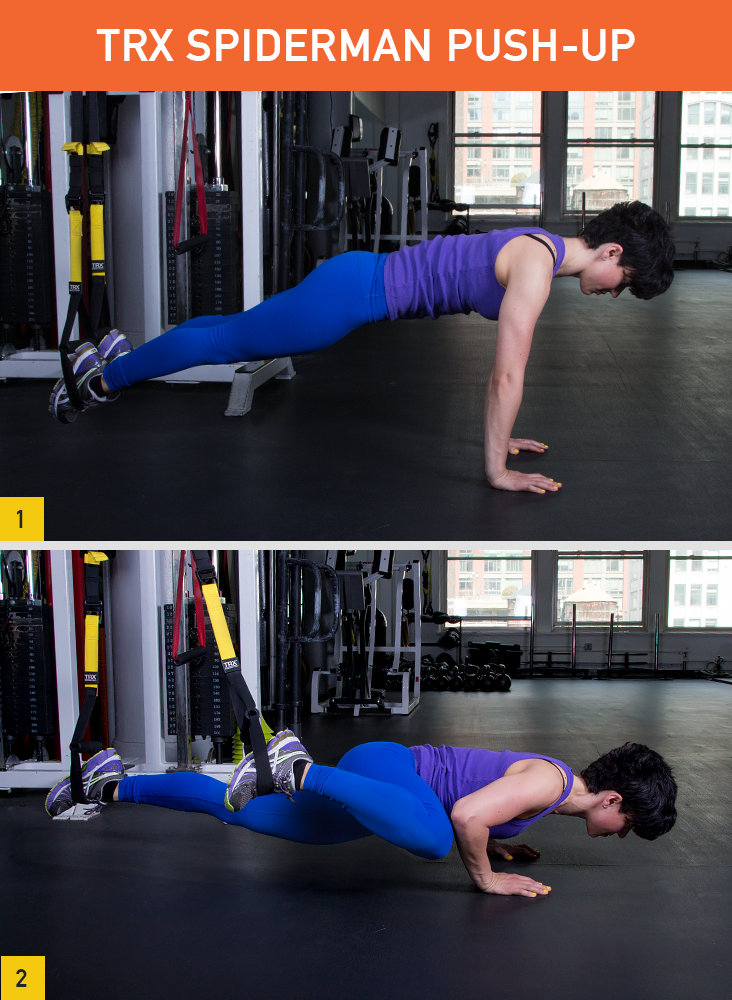
36. Spiderman Push-UpTargets: Chest, triceps, obliques, quads, lower back, shoulders, and core (plus, it opens up the hips)
Difficulty: Advanced
How to: Regular
spiderman push-ups aren’t for the faint of heart. Add in a destabilizing element—that’d be having our feet suspended in the air behind us—and we’ve got one amazing shape-up move on our hands. With one foot in each loop, start off in plank pose. Lower your body down into a pushup, bringing the right knee to the right elbow—this is when you’re firing up your obliques. Return to start and repeat with the left leg.
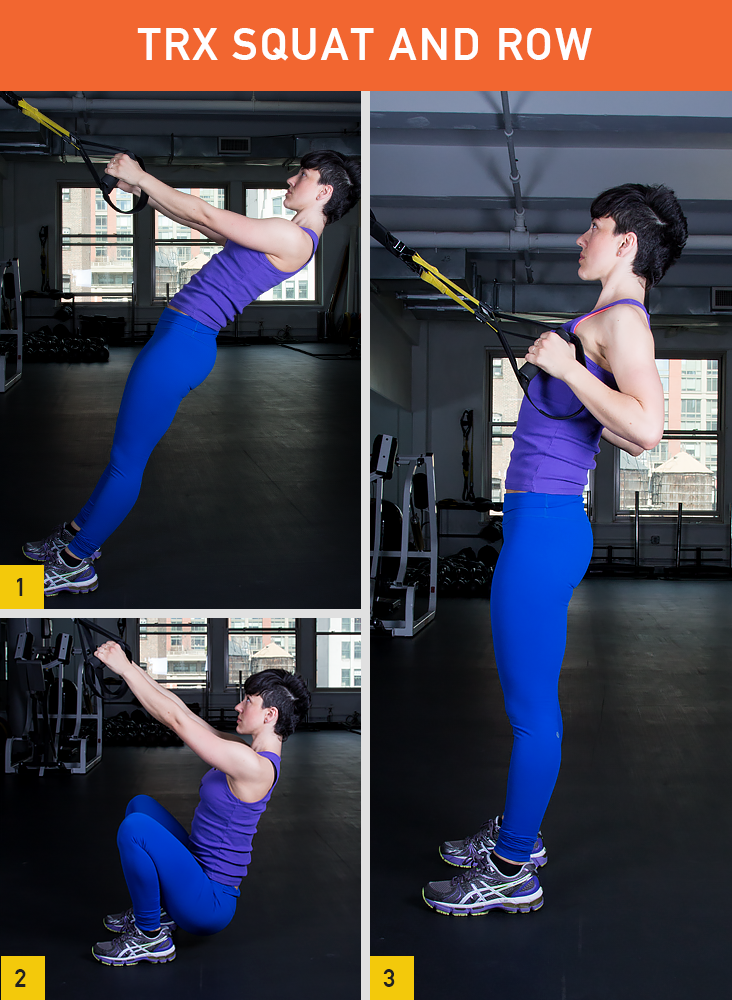
38. Squat and RowTargets: Glutes, hamstrings, quads, upper back
Difficulty: Intermediate
How to: Another two-in-one stunner, this move combines an excellent lower body move with a super effective upper body exercise. Start off by holding both handles in front of your waist, elbows bent by your sides. Lean back, extending arms in front of you at eye level. Lower your body down into a squat, using the TRX straps to help you keep your balance. Push back up to start, and then pull body up and towards the anchor as you bend your elbows and bring chest closer to palms. Return to start.
39. Burpee to ScorpionTargets: Shoulders, chest, arms, abs, butt, legs, obliques
Difficulty: Advanced
How to: In case you’ve mastered the single-leg burpee (or you’re just up for a new challenge), try
thisbody-rocking move. The “scorpion” part of this movement targets your obliques, working to whittle your middle and build a super strong core. With one foot hooked into the straps behind you, perform a single-leg burpee as usual. After the push-up portion, remain in plank position and bring your free leg under and across your body, then swing it back around to move it over and
above your body. Return to standing.
CORE
40. Suspended PlankTargets: Abs, obliques, shoulders
Difficulty: Beginner
How to: For a basic but challenging way to work the TRX into your routine, pump up your planks with a little (more) instability. Face away from the anchor and slip your toes into the stirrups so that feet face downwards. Just as you would with a regular plank, lift your upper body up onto forearms. Challenge yourself to hold the position as long as you can without compromising your form.
41. Pendulum SwingTargets: Abs and obliques
Difficulty: Intermediate
How to: Who knew swinging around could make you break such a sweat? Face away from the TRX, place your feet in the cradles, and get into plank position. Keeping them together throughout the movement, swing legs over to the left side, bending knees toward your left elbow, engaging obliques. Swing your legs back into plank position and then over to the right elbow in one fluid motion. Return to plank pose.
42. Torso RotationTargets: Abs, obliques
Difficulty: Intermediate
How to: Spin your torso (right round) for a strong midsection. Face the anchor point and use both hands to grab the TRX straps. Position your legs in a wide stance and lean back until the straps are taut in front of you. As you pull your body up, twist to the right, keeping your arms straight and your core tight. Return to start and repeat on the left side.
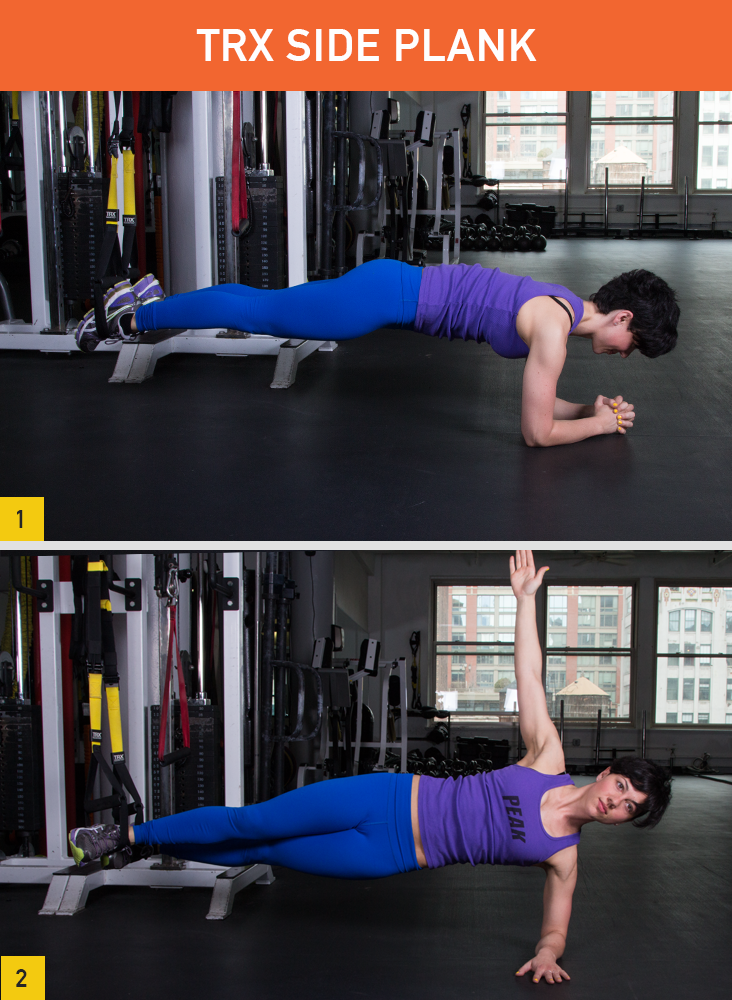
43. Side PlankTargets: Obliques
Difficulty: Beginner
How to: TRX + yoga = a match made in fitness heaven. Lie on your left side and place both feet into the cradles. Stack your elbow under shoulder, and lift yourself up into a side plank. To make it harder,
reach your free hand under your torso to the floor behind body. Looking for yet another variation? Try lowering your hip to the floor and raising it back up into the side plank. Hold for a few seconds at the top, and then repeat.
44. Atomic Pike/Suspended PikeTargets: Shoulders and abs
Difficulty: Intermediate
How to: Assume the position! Plank position, that is. Hook your feet in each of the cradles and lift body up into plank pose. Keeping legs and arms straight and core tight, lift your hips up into an inverted “V.” Lower to start. You’ll feel your abs working and your shoulders struggling to hold you up as you lower and lift your hips.
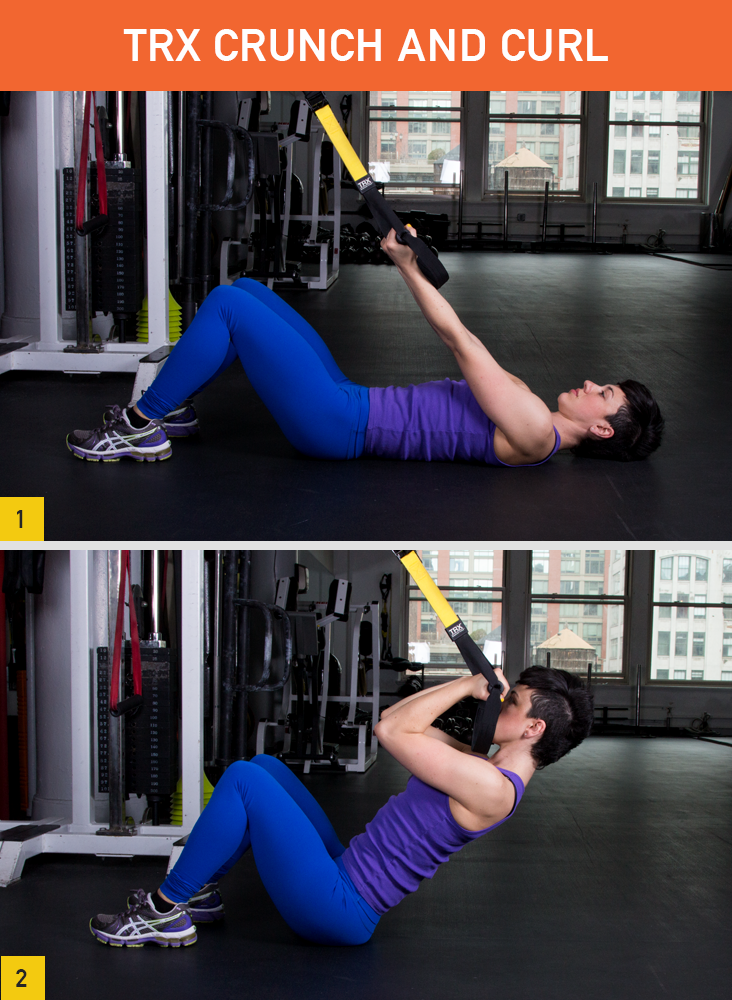
45. Crunch and CurlTargets: Biceps, abs
Difficulty: Beginner
How to: Why not turn a crunch into a biceps exercise? With the TRX, you totally can! Sit down facing the anchor. Grab the handles with an underhand grip, then lie down with your knees bent and feet flat on the floor, arms extended up in the air front of you. Keep your core tight and lift your shoulders and back off the floor, simultaneously curling your hands toward your shoulders. Lower down to start.
The Products
Eager to give TRX a try?